How to Design a Print Using Vectors
BFS using vectors & queue as per the algorithm of CLRS
Breadth-first search traversal of a graph using the algorithm given in CLRS book.
BFS is one of the ways to traverse a graph. It is named so because it expands the frontier between discovered and undiscovered vertices uniformly across the breadth of the frontier. What it means is that the algorithm first discovers all the vertices connected to "u" at a distance of k before discovering the vertices at a distance of k+1 from u. The algorithm given in CLRS uses the concept of "colour" to check if a vertex is discovered fully or partially or undiscovered. It also keeps a track of the distance a vertex u is from the source s.
BFS(G,s) 1 for each vertex u in G.V - {s} 2 u.color = white 3 u.d = INF 4 u.p = NIL 5 s.color = green 6 s.d = 0 7 s.p = NIL 8 Q = NULL 9 ENQUEUE(Q,s) 10 while Q != NULL 11 u = DEQUEUE(Q) 12 for each v in G.Adj[u] 13 if v.color == white 14 v.color = green 15 v.d = u.d + 1 16 v.p = u 17 ENQUEUE(Q,v) 18 u.color = dark_green It produces a "breadth-first tree" with root s that contains all reachable vertices. Let's take a simple directed graph and see how BFS traverses it.
Attention reader! Don't stop learning now. Get hold of all the important DSA concepts with the DSA Self Paced Course at a student-friendly price and become industry ready. To complete your preparation from learning a language to DS Algo and many more, please refer Complete Interview Preparation Course .
In case you wish to attend live classes with experts, please refer DSA Live Classes for Working Professionals and Competitive Programming Live for Students.
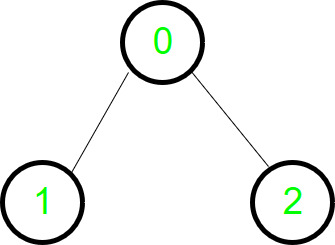
The graph
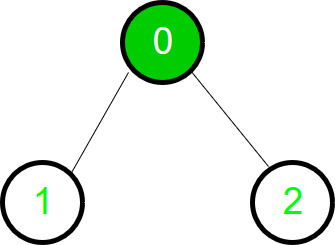
Starting of traversal

1st traversal
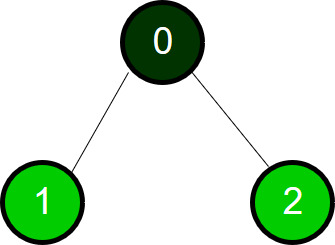
1st traversal completes
C++
#include <bits/stdc++.h>
using namespace std;
vector<string> colour;
vector< int > d;
vector< int > p;
void addEdge(vector < int > g[], int u, int v)
{
g[u].push_back(v);
g[v].push_back(u);
}
void BFSSingleSource(vector < int > g[], int s)
{
queue< int > q;
q.push(s);
d[s] = 0;
colour[s] = "green" ;
while (!q.empty())
{
int u = q.front();
q.pop();
cout << u << " " ;
for ( auto i = g[u].begin(); i != g[u].end(); i++)
{
if (colour[*i] == "white" )
{
colour[*i] = "green" ;
d[*i] = d[u] + 1;
p[*i] = u;
q.push(*i);
}
}
colour[u] = "dark_green" ;
}
}
void BFSFull(vector < int > g[], int n)
{
colour.assign(n, "white" );
d.assign(n, 0);
p.assign(n, -1);
for ( int i = 0; i < n; i++)
if (colour[i] == "white" )
BFSSingleSource(g, i);
}
int main()
{
int n = 7;
vector < int > g[n];
addEdge(g, 0, 1);
addEdge(g, 0, 2);
addEdge(g, 1, 3);
addEdge(g, 1, 4);
addEdge(g, 2, 5);
addEdge(g, 2, 6);
BFSFull(g, n);
return 0;
}
Python3
import queue
def addEdge(g, u, v):
g[u].append(v)
g[v].append(u)
def BFSSingleSource(g, s):
q = queue.Queue()
q.put(s)
d[s] = 0
colour[s] = "green"
while ( not q.empty()):
u = q.get()
print (u, end = " " )
i = 0
while i < len (g[u]):
if (colour[g[u][i]] = = "white" ):
colour[g[u][i]] = "green"
d[g[u][i]] = d[u] + 1
p[g[u][i]] = u
q.put(g[u][i])
i + = 1
colour[u] = "dark_green"
def BFSFull(g, n):
colour = [ "white" ] * n
d = [ 0 ] * n
p = [ - 1 ] * n
for i in range (n):
if (colour[i] = = "white" ):
BFSSingleSource(g, i)
n = 7
colour = [ None ] * n
d = [ None ] * n
p = [ None ] * n
g = [[] for i in range (n)]
addEdge(g, 0 , 1 )
addEdge(g, 0 , 2 )
addEdge(g, 1 , 3 )
addEdge(g, 1 , 4 )
addEdge(g, 2 , 5 )
addEdge(g, 2 , 6 )
BFSFull(g, n)
Javascript
<script>
var colour = [];
var d = [];
var p = [];
function addEdge(g, u, v)
{
g[u].push(v);
g[v].push(u);
}
function BFSSingleSource(g, s)
{
var q = [];
q.push(s);
d[s] = 0;
colour[s] = "green" ;
while (q.length!=0)
{
var u = q[0];
q.shift();
document.write( u + " " );
for ( var i of g[u])
{
if (colour[i] == "white" )
{
colour[i] = "green" ;
d[i] = d[u] + 1;
p[i] = u;
q.push(i);
}
}
colour[u] = "dark_green" ;
}
}
function BFSFull(g, n)
{
colour = Array(n).fill( "white" );
d = Array(n).fill(0);
p = Array(n).fill(0);
for ( var i = 0; i < n; i++)
if (colour[i] == "white" )
BFSSingleSource(g, i);
}
var n = 7;
var g = Array.from(Array(n), ()=>Array());
addEdge(g, 0, 1);
addEdge(g, 0, 2);
addEdge(g, 1, 3);
addEdge(g, 1, 4);
addEdge(g, 2, 5);
addEdge(g, 2, 6);
BFSFull(g, n);
</script>
Output:
0 1 2 3 4 5 6
How to Design a Print Using Vectors
Source: https://www.geeksforgeeks.org/bfs-using-vectors-queue-per-algorithm-clrs/
0 Response to "How to Design a Print Using Vectors"
Post a Comment